The ULTIMATE Guide to Baking PERFECT Cookies (+ 5 Must-Try Recipes)
Struggling with cookie fails? Unlock the secrets to baking perfect cookies every time with our ULTIMATE guide! Learn essential cookie science, pro tips, troubleshooting common problems, and get 5 delicious, must-try recipes: chewy chocolate chip, classic sugar, soft peanut butter, fudgy brownie, and simple oatmeal raisin. Bake amazing homemade cookies with confidence! #cookies #baking #cookierecipes #bakingtips #chocolatechipcookies #sugarcookies #peanutbuttercookies #oatmealcookies #browniecookies #homemadecookies
5/17/202514 min read

The ULTIMATE Guide to Baking PERFECT Cookies (+ 5 Must-Try Recipes)
Okay, let's be real. Who doesn't love a good cookie? That moment when you bite into a perfectly baked treat – maybe it's gloriously chewy in the center, perfectly crisp on the edges, or delightfully soft and melt-in-your-mouth. Ah, pure bliss!
But sometimes, okay, often, baking them at home feels like a lottery, right? One batch is flat and greasy, the next is hard hockey pucks, and then you get that one batch that’s absolutely magical, and you have no idea why!
Well, my friend, consider this your personal invitation to the 'Perfect Cookie Club'. I'm spilling all my secrets, tips, and yes, the science behind those dreamy bites you crave. We're going to break it down so you can consistently bake cookies that make you (and everyone you share them with) happy dance.
Think of me as your friendly baking buddy, ready to walk you through everything you need to know. Get ready to ditch the guesswork and bake with confidence! Plus, we're diving into 5 absolute go-to recipes that are guaranteed crowd-pleasers once you master the basics.
Let's get baking!
The Foundation: Understanding Cookie Science (It's Easier Than It Sounds!)
Baking isn't just dumping ingredients in a bowl; it's a little bit of delicious chemistry! Understanding how your key ingredients interact is crucial for controlling your cookie's final texture and spread.
Butter: This is your primary fat. Softened butter creamed with sugar creates air pockets (hello, texture!). Melted butter leads to chewier, denser cookies with more spread. Using cold butter can result in less spread. The temperature of your butter is super important! Always use unsalted unless a recipe specifies salted.
Sugar: Different sugars do different things!
Granulated Sugar: Contributes to spread and crispness.
Brown Sugar: Adds moisture (thanks to molasses), chewiness, and flavor. A recipe with more brown sugar than white will be chewier.
Powdered Sugar: Used in shortbreads and some sugar cookies for a tender, melt-in-your-mouth texture.
Flour: Gives your cookies structure.
All-Purpose Flour: The standard. Most cookie recipes use this.
Cake/Pastry Flour: Lower protein content, leads to more tender, delicate cookies.
Bread Flour: Higher protein, results in chewier, sometimes tougher cookies. Using too much flour is a very common reason for dry, cakey cookies. Measure carefully!
Eggs: Act as a binder, add richness, and contribute to leavening. Using yolks vs. whites can affect chewiness and tenderness. Make sure your eggs are at room temperature – they emulsify better with the butter and sugar, creating a smoother dough.
Leaveners (Baking Soda & Baking Powder): These are your lift-givers!
Baking Soda: Needs an acid (like brown sugar, molasses, or buttermilk) to activate. Helps cookies spread and brown.
Baking Powder: Contains its own acid and reacts when mixed with liquid and again when heated. Gives cookies more lift and cakiness. Many recipes use both for different effects!

Essential Tools for Cookie Success
While you can technically bake cookies with minimal equipment, having the right tools makes the process easier, more consistent, and frankly, more fun!
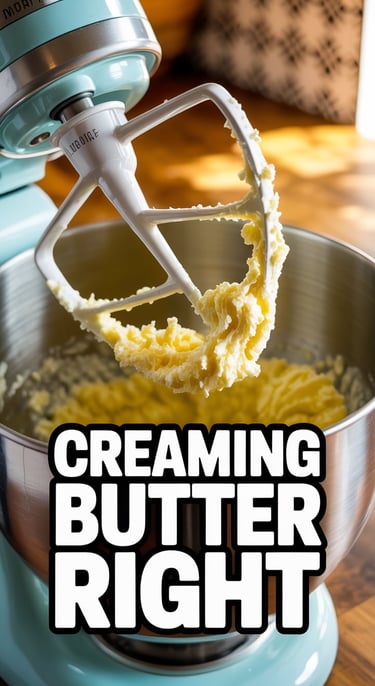
Tired of tired arms from mixing or ready to take your creaming game to the next level for that perfect texture? Want to add this game-changer to your routine? Shop it on Amazon!
Stand Mixer or Hand Mixer: While you can mix dough by hand, a mixer (especially a stand mixer for larger batches or tougher doughs) ensures consistent creaming of butter and sugar and thorough mixing without overworking the dough.
Precision is key in baking, especially when it comes to flour and sugar! Ready to measure like a pro for consistent results every time and avoid adding too much flour? Find out more about this must-have product!
Digital Kitchen Scale: Measuring by weight (grams) is far more accurate than volume (cups). Different people scoop flour differently, leading to variations. A scale eliminates this guesswork.
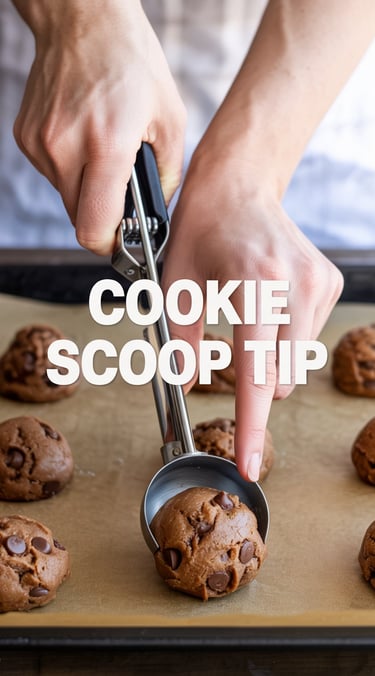
Want perfectly uniform cookies that bake evenly because they are all the same size? Struggling with uneven sizes leading to some burnt and some underbaked? This might be your holy grail. Grab yours now!
Cookie Scoops (various sizes): These are invaluable for creating consistently sized cookies. This means they bake evenly at the same rate, preventing that annoying mix of burnt and raw cookies on the same sheet.
A good foundation matters for even heat distribution! Looking for baking sheets that heat evenly, prevent burning, and last through countless batches? Ready to see what the hype is about? Check it out here!
Light-Colored, Heavy-Duty Aluminum Baking Sheets: Avoid dark, flimsy sheets which can cause the bottoms of your cookies to burn before the tops are done. Look for sturdy, light-colored ones that conduct heat evenly.
Tired of cookies sticking to the pan and messy cleanup? Want a non-stick surface that ensures easy release and even baking? Click here to get yours and start seeing results!
Parchment Paper or Silicone Baking Mats: Lining your baking sheet prevents sticking, promotes even browning on the bottom, and makes cleanup a breeze. Parchment is disposable; silicone mats (like Silpat) are reusable.
Looking for a reliable, reusable alternative to parchment paper that offers excellent non-stick properties and promotes even baking? Find out more about this must-have product!
Silpat Silicone Baking Mat: A reusable version of the parchment paper magic! Great for delicate cookies and easy cleanup.
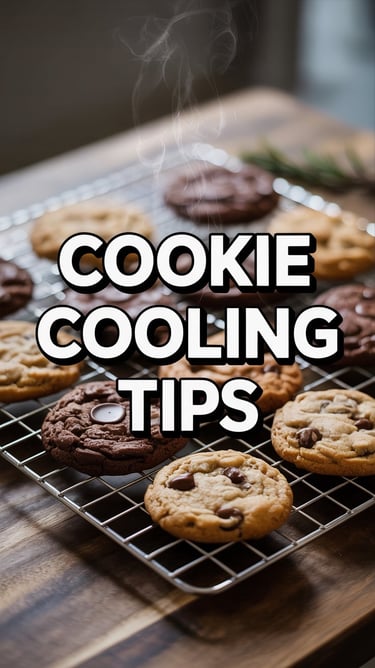
Proper cooling is essential for preventing soggy bottoms and completing the baking process! Ready to see what the hype is about? Check it out here!
Wire Cooling Rack: Cookies continue to bake slightly from residual heat after coming out of the oven. Moving them to a wire rack allows air circulation to stop this process and prevents the bottom from getting soggy.
Accurate measuring of liquids and smaller quantities is non-negotiable for predictable results! Want reliable tools that will help you get it right every time for both dry and wet ingredients? Click here to get yours and start seeing results!
Reliable Measuring Cups and Spoons: While a scale is best for dry ingredients like flour and sugar, you'll still need accurate cups and spoons for liquids, extracts, leaveners, and salt.
You'll also want basic items like mixing bowls, a sturdy spatula, and a whisk!

Mastering the Technique: Your Step-by-Step Guide
Even with the best ingredients and tools, technique matters! Here's how to handle your cookie dough for optimal results:
Read the Recipe (Seriously!): Before you even get ingredients out, read the recipe from start to finish. Understand the steps, required temperatures, and chilling times.
Room Temperature is Your Friend: Ensure butter and eggs are at room temperature as specified by the recipe. Softened butter (not melted!) should give slightly when pressed but hold its shape. Room temp eggs incorporate better.
Cream Butter and Sugar Properly: This is where you beat softened butter and sugar together until light and fluffy. This process incorporates air, which helps with lift and texture. Scrape down the bowl frequently. Don't rush this step, but also don't over-cream – you're looking for maybe 2-5 minutes depending on your mixer.
Add Eggs and Vanilla: Add eggs one at a time, mixing until just incorporated after each. Add vanilla and mix briefly. Don't overmix here.
Combine Dry Ingredients: Whisk your flour, leaveners, salt, and any spices together in a separate bowl. This ensures they are evenly distributed before adding to the wet ingredients.
Add Dry to Wet (and Don't Overmix!): Add the dry ingredients to the wet ingredients. Mix on low speed just until the last streaks of flour disappear. STOP. Overmixing develops gluten, which can make your cookies tough. A few small patches of unmixed flour are better than overmixing.
Stir in Mix-ins: If adding chocolate chips, nuts, etc., stir them in gently by hand with a spatula or on the lowest mixer speed for just a few seconds.
Chill the Dough (Often Crucial!): Most drop cookie doughs benefit hugely from chilling for at least 30 minutes, or even 24-72 hours. Why?
The fat solidifies, leading to less spread in the oven (thicker cookies!).
Flavors meld and deepen.
The dry ingredients hydrate fully, improving texture.
It makes the dough easier to handle, especially for cut-out cookies.
Scoop and Space: Use your cookie scoop for even sizes. Place dough balls on your prepared baking sheet, giving them enough space to spread (check the recipe for guidance, usually 2-3 inches apart).
Bake Smart:
Preheat your oven fully to the correct temperature. An oven thermometer is helpful here as oven temps can be inaccurate.
Bake one sheet at a time in the center rack for best results. If baking multiple sheets, rotate them halfway through.
Bake for the time specified, but start checking a minute or two early. Cookies are often done when the edges are set and lightly golden, but the center still looks slightly soft and perhaps a little underbaked. The residual heat will finish them.
Cool Correctly: Let cookies rest on the hot baking sheet for 2-10 minutes (check the recipe!) before transferring them to a wire cooling rack to cool completely. This allows them to finish setting without getting soggy bottoms.
Troubleshooting Common Cookie Problems
Don't get discouraged if your first few batches aren't perfect! Baking is a skill, and practice makes perfect (or at least perfectly edible!).
Flat, Greasy Cookies:
Culprit: Butter was too soft or melted.
Fix: Ensure butter is just softened, not greasy. Chill the dough thoroughly before baking.
Culprit: Over-creaming butter and sugar (too much air incorporated).
Fix: Cream only until light and fluffy, don't go for excessive volume.
Culprit: Oven temperature is too low.
Fix: Check oven temp with a thermometer. A low temp causes butter to melt and spread too much before the cookie structure sets.
Hard, Dry, or Cakey Cookies:
Culprit: Too much flour.
Fix: Measure carefully, ideally by weight using a digital scale. Don't pack flour into cups.
Culprit: Overmixing the dough.
Fix: Mix only until ingredients are just combined.
Culprit: Overbaking.
Fix: Remove cookies when edges are set but centers are still slightly soft.
Cookies Not Spreading Enough:
Culprit: Butter was too cold.
Fix: Ensure butter is properly softened.
Culprit: Too much flour or not enough fat.
Fix: Measure accurately. Double-check recipe ratios.
Culprit: Oven temperature is too high.
Fix: Check oven temp with a thermometer. A high temp sets the cookie structure too quickly before it has a chance to spread.
Unevenly Baked Cookies:
Culprit: Hot spots in your oven.
Fix: Rotate baking sheets halfway through baking.
Culprit: Using dark or warped baking sheets.
Fix: Use light-colored, flat, heavy-duty sheets.
Culprit: Unevenly sized dough balls.
Fix: Use a cookie scoop for consistency.


5 Must-Try PERFECT Cookie Recipes
Now that you've got the knowledge, let's put it to practice! Here are 5 classic, reliable recipes that are perfect for honing your skills.
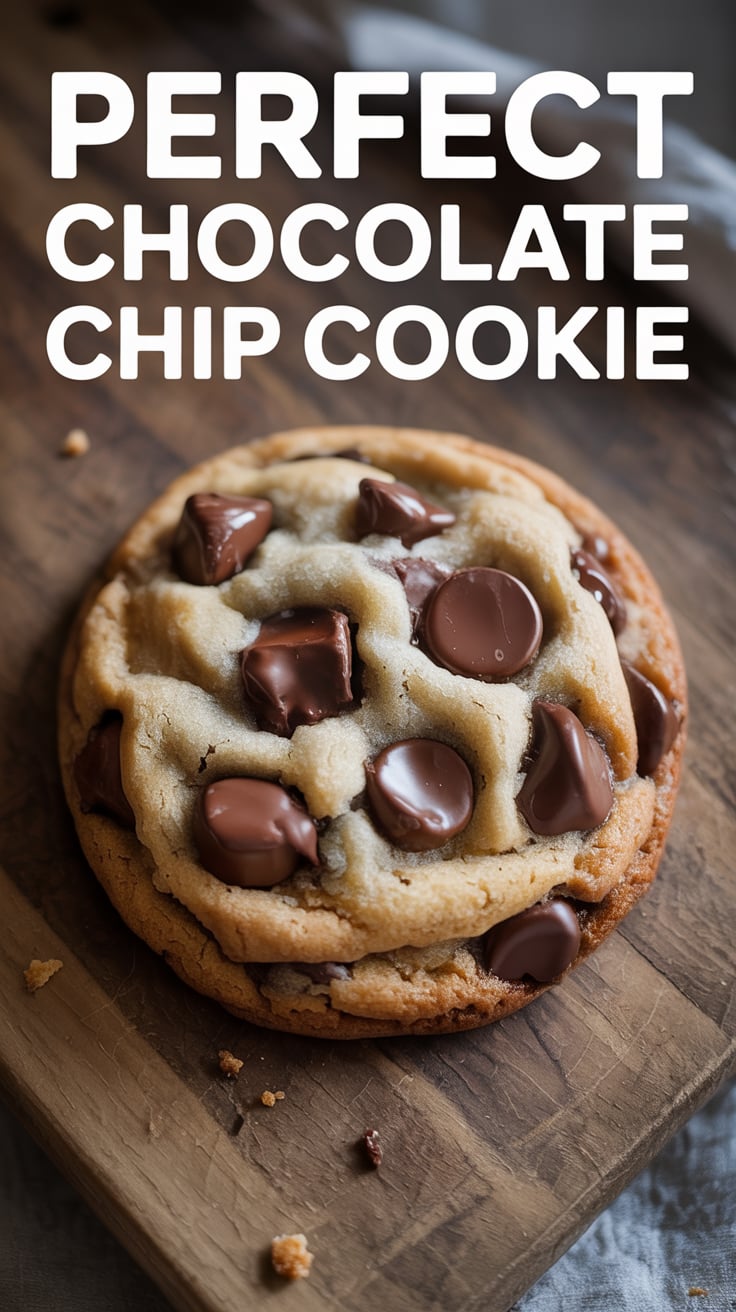
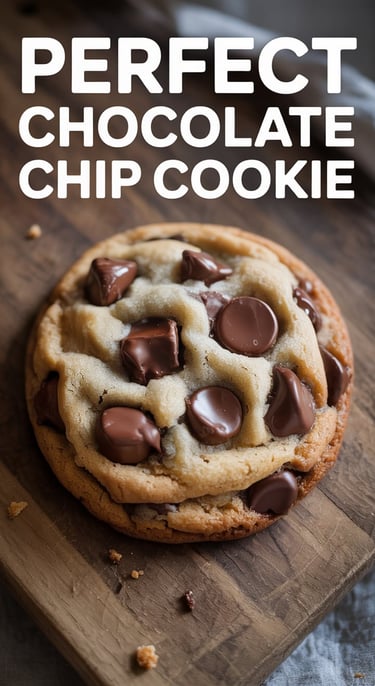
1. The Ultimate Chewy Chocolate Chip Cookies
This recipe focuses on ingredients and technique to achieve that coveted chewy center and slightly crisp edge.
Yields: About 24 cookies
Prep time: 15 minutes + 1 hour chill time (minimum)
Bake time: 9-12 minutes
Ingredients:
1 cup (2 sticks) unsalted butter, softened
¾ cup granulated sugar
¾ cup packed light brown sugar
2 large eggs, room temperature
1 teaspoon vanilla extract
2 ¼ cups all-purpose flour
1 teaspoon baking soda
½ teaspoon salt
1 ½ cups chocolate chips (a mix of milk, semi-sweet, or dark is great!)
Instructions:
In a large bowl, cream together the softened butter, granulated sugar, and brown sugar until light and fluffy (about 2-3 minutes with an electric mixer).
Beat in the eggs one at a time, mixing until just combined after each addition. Stir in the vanilla extract.
In a separate medium bowl, whisk together the flour, baking soda, and salt.
Gradually add the dry ingredients to the wet ingredients, mixing on low speed just until no dry streaks remain. Do not overmix.
Stir in the chocolate chips with a spatula or on the lowest mixer speed briefly.
Cover the dough and chill in the refrigerator for at least 1 hour. For chewier cookies and deeper flavor, chill for 24-72 hours.
Preheat oven to 375°F (190°C). Line baking sheets with parchment paper or silicone mats.
Scoop dough using a medium cookie scoop (about 1.5 to 2 tablespoons) and place balls 2-3 inches apart on the prepared baking sheets.
Bake for 9-12 minutes, or until edges are set and lightly golden but the centers still look slightly soft.
Let cookies cool on the baking sheets for 5-10 minutes before transferring to a wire rack to cool completely.
2. Classic Cut-Out Sugar Cookies
Perfect for decorating! This dough holds its shape well during baking.
Yields: Varies depending on cookie cutter size
Prep time: 20 minutes + 1 hour chill time (minimum)
Bake time: 8-11 minutes
Ingredients:
1 cup (2 sticks) unsalted butter, softened
1 ½ cups granulated sugar
2 large eggs, room temperature
1 teaspoon vanilla extract
3 cups all-purpose flour
½ teaspoon baking powder
¼ teaspoon salt
Instructions:
In a large bowl, cream together the softened butter and granulated sugar until light and fluffy.
Beat in the eggs one at a time, then stir in the vanilla extract.
In a separate medium bowl, whisk together the flour, baking powder, and salt.
Gradually add the dry ingredients to the wet ingredients, mixing on low speed just until combined. Do not overmix.
Divide the dough in half, flatten each half into a disk, wrap in plastic wrap, and chill in the refrigerator for at least 1 hour (or up to 2 days).
Preheat oven to 375°F (190°C). Line baking sheets with parchment paper or silicone mats.
On a lightly floured surface, roll out one disk of chilled dough to about ¼ inch thickness.
Cut out shapes using cookie cutters and carefully transfer to the prepared baking sheets, placing them about 1 inch apart. Re-roll scraps once.
Bake for 8-11 minutes, or until the edges are lightly golden and the centers look set (they won't brown much).
Let cookies cool on the baking sheets for 2-3 minutes before transferring to a wire rack to cool completely. Decorate once fully cooled.


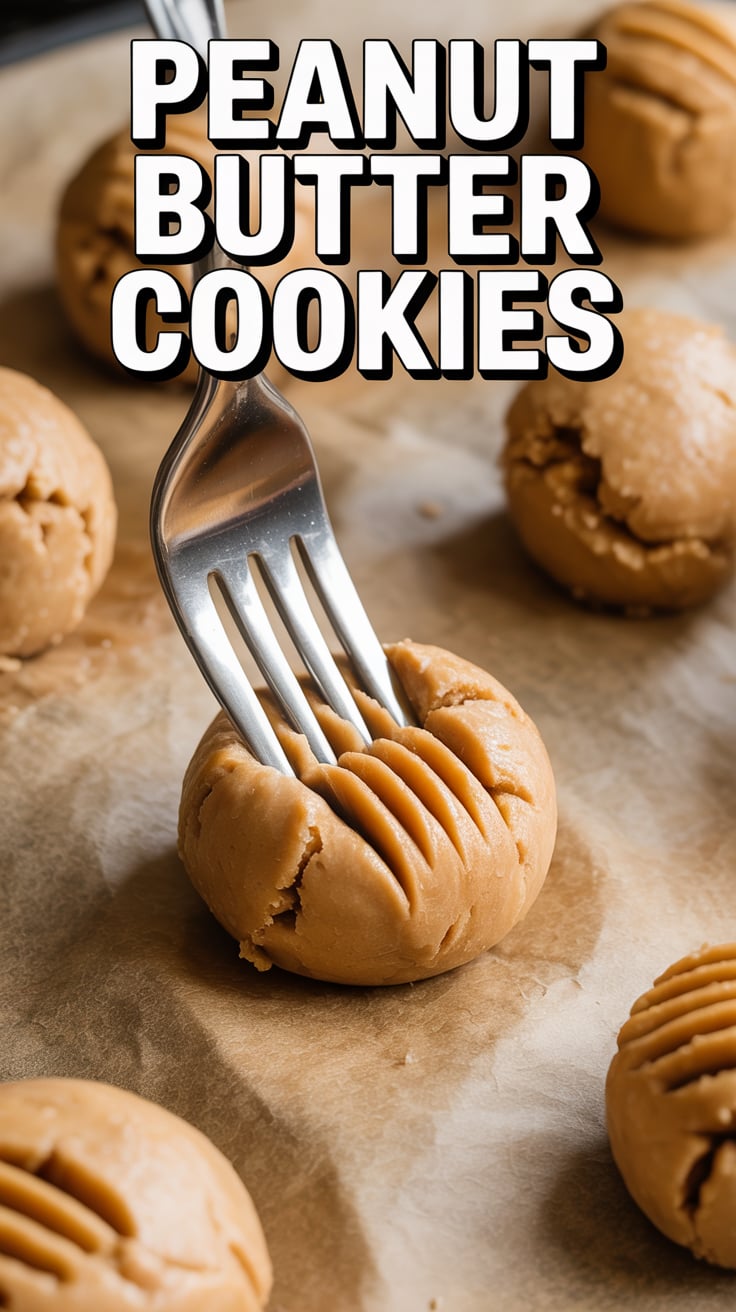
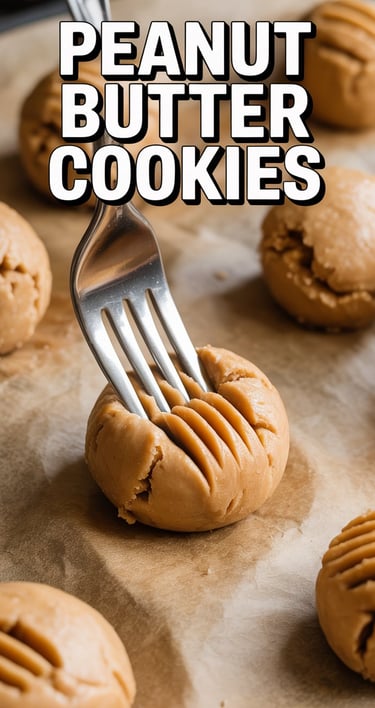
3. Soft & Chewy Peanut Butter Cookies
These classic cookies are known for their fork-tine crosshatch pattern!
Yields: About 3 dozen
Prep time: 15 minutes
Bake time: 10-12 minutes
Ingredients:
1 cup (2 sticks) unsalted butter, softened
1 cup creamy peanut butter
1 cup granulated sugar
1 cup packed light brown sugar
2 large eggs, room temperature
1 teaspoon vanilla extract
2 ½ cups all-purpose flour
1 teaspoon baking soda
½ teaspoon baking powder
½ teaspoon salt
Instructions:
In a large bowl, cream together the softened butter, creamy peanut butter, granulated sugar, and brown sugar until light and fluffy.
Beat in the eggs one at a time, mixing until just combined after each addition. Stir in the vanilla extract.
In a separate medium bowl, whisk together the flour, baking soda, baking powder, and salt.
Gradually add the dry ingredients to the wet ingredients, mixing on low speed just until combined. Do not overmix.
Preheat oven to 350°F (175°C). Line baking sheets with parchment paper or silicone mats.
Roll dough into 1-inch balls. Place balls about 2 inches apart on the prepared baking sheets.
Use a fork to flatten each cookie dough ball, creating a crosshatch pattern.
Bake for 10-12 minutes, or until edges are set and lightly golden but the centers still look soft. They won't spread a ton.
Let cookies cool on the baking sheets for a few minutes before transferring to a wire rack to cool completely.
4. Fudgy Brownie Cookies
For when you can't decide between a brownie and a cookie! These are rich, dense, and intensely chocolatey.
Yields: About 2 dozen
Prep time: 15 minutes
Bake time: 9-11 minutes
Ingredients:
½ cup (1 stick) unsalted butter, melted
1 ½ cups granulated sugar
2 large eggs
1 teaspoon vanilla extract
½ cup unsweetened cocoa powder (natural or Dutch-process)
¾ cup all-purpose flour
½ teaspoon baking powder
¼ teaspoon salt
1 cup chocolate chips (dark or semi-sweet)
Instructions:
In a large bowl, whisk together the melted butter and granulated sugar until well combined.
Whisk in the eggs one at a time until incorporated, then stir in the vanilla extract.
In a separate medium bowl, whisk together the cocoa powder, flour, baking powder, and salt.
Gradually add the dry ingredients to the wet ingredients, mixing with a spatula or on low speed just until no dry streaks remain. The dough will be thick.
Stir in the chocolate chips.
Cover the dough and chill in the refrigerator for at least 30 minutes to make it easier to handle.
Preheat oven to 350°F (175°C). Line baking sheets with parchment paper or silicone mats.
Scoop dough using a medium cookie scoop and place balls 2-3 inches apart on the prepared baking sheets.
Bake for 9-11 minutes, or until the edges look set and slightly puffed. The centers will still look very soft. Do NOT overbake these!
Let cookies cool on the baking sheets for at least 10 minutes before carefully transferring to a wire rack to cool completely. They are delicate when warm.


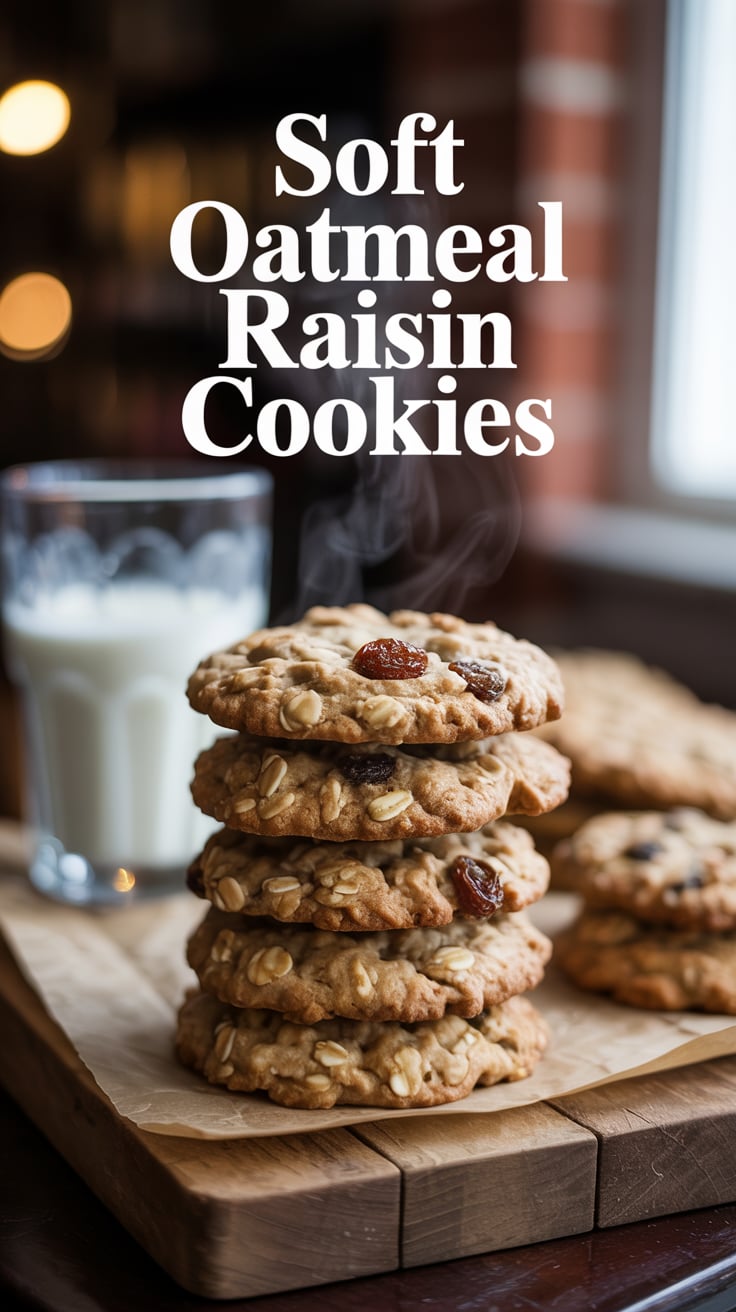
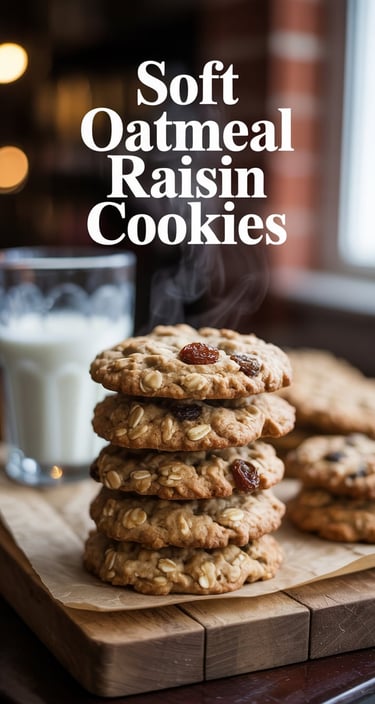
5. Simple Soft Oatmeal Raisin Cookies
A comforting classic with a lovely chewy texture thanks to the oats.
Yields: About 3 dozen
Prep time: 15 minutes
Bake time: 10-13 minutes
Ingredients:
1 cup (2 sticks) unsalted butter, softened
¾ cup granulated sugar
1 cup packed light brown sugar
2 large eggs, room temperature
1 teaspoon vanilla extract
1 ½ cups all-purpose flour
1 teaspoon baking soda
1 teaspoon ground cinnamon
½ teaspoon salt
3 cups old-fashioned rolled oats (not instant)
1 ½ cups raisins
Instructions:
In a large bowl, cream together the softened butter, granulated sugar, and brown sugar until light and fluffy.
Beat in the eggs one at a time, mixing until just combined after each addition. Stir in the vanilla extract.
In a separate medium bowl, whisk together the flour, baking soda, cinnamon, and salt.
Gradually add the dry ingredients to the wet ingredients, mixing on low speed just until combined. Do not overmix.
Stir in the rolled oats and raisins with a spatula or on the lowest mixer speed briefly.
Preheat oven to 375°F (190°C). Line baking sheets with parchment paper or silicone mats.
Scoop dough using a medium cookie scoop (about 1.5 to 2 tablespoons) and place balls 2-3 inches apart on the prepared baking sheets.
Bake for 10-13 minutes, or until edges are set and lightly golden but the centers still look soft.
Let cookies cool on the baking sheets for 5-10 minutes before transferring to a wire rack to cool completely.
Frequently Asked Questions About Baking Cookies
Can I freeze cookie dough? Absolutely! Most drop cookie doughs can be scooped into balls, placed close together on a parchment-lined sheet, frozen until solid, and then transferred to a freezer-safe bag or container for up to 3-6 months. Bake from frozen, adding a minute or two to the baking time.
Why is chilling cookie dough so important? Chilling solidifies the fat, which controls spread for thicker cookies. It also allows the flavors to develop and dry ingredients to hydrate fully, resulting in a better texture and richer taste.
What's the difference between baking soda and baking powder in cookies? Baking soda spreads cookies horizontally and needs an acid to activate. Baking powder gives cookies vertical lift and a cakier texture and activates with liquid and heat. Many recipes use a combination for balanced spread and lift.
How should I store baked cookies? Store most soft or chewy cookies in an airtight container at room temperature. If storing different types together, they can affect each other's texture, so storing separately is best if possible. Crisp cookies are often best stored in a container with a slightly loose lid. You can also freeze most baked cookies for up to 3-4 months.
Disclaimer
This blog post contains affiliate links, meaning I may earn a small commission if you click through and make a purchase, at no extra cost to you. All opinions are my own and based on personal baking experience. I am not a professional baker, but I love sharing what I've learned through trial and error (and lots of cookie eating!).
Final Thoughts
You've got this! Baking perfect cookies isn't about magic; it's about understanding a few key principles and practicing. Start with one of the recipes above, pay attention to your ingredients and technique, and don't be afraid to experiment (maybe after your first successful batch!).
Soon, you'll be pulling consistently gorgeous, delicious cookies out of your oven, filling your home with that irresistible aroma and your plate with happiness.
Which recipe are you most excited to try first? Let me know in the comments below! Happy Baking!


BEST Gourmet Cookie Recipes
Contact:
bestgourmetcokies@gmail.com
Best Gourmet Cookie Recipes © 2025. All rights reserved.